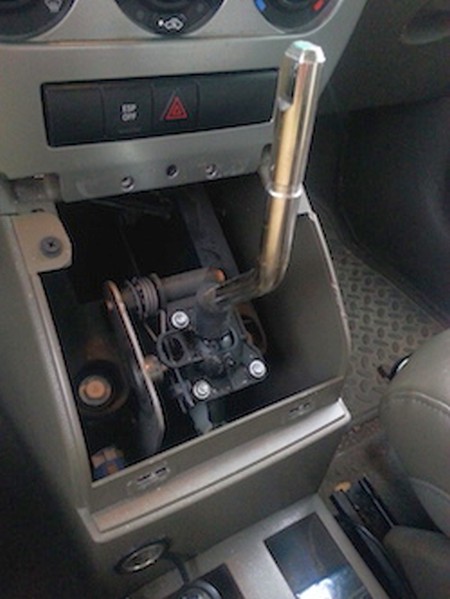
1. Remove the shift nob by simply pulling straight up. This will take a decent amount of force.
2. Remove the rubber shift boot and the plastic surrounding it together. The plastic piece is held in by two clips at the bottom. Pull on the bottom of it to pop those out and then the top will slide out.
3. Slide the shift boot and plastic piece off of the shift lever.
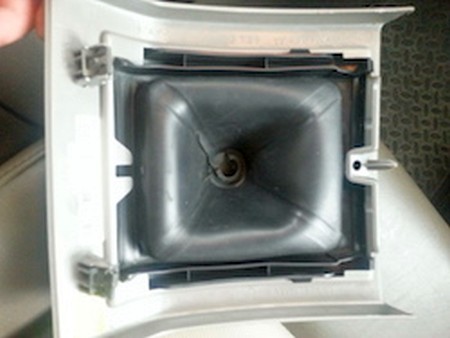
4. Remove the rubber shift boot from the plastic piece by flipping it over and pushing in the tabs holding them together.
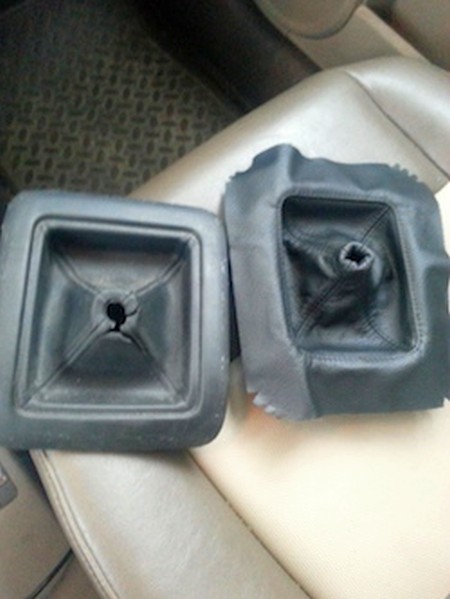
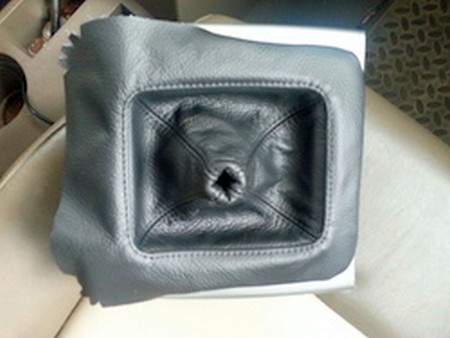
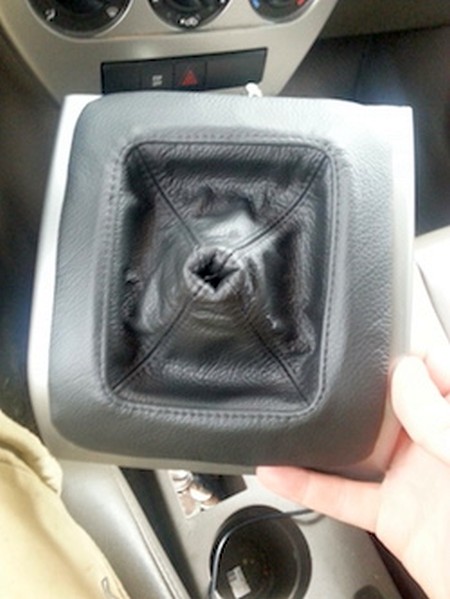
5. Keep the rubber shift boot, the leather will just fit over top of it. Determine which way the leather fits on the rubber boot. Because the bottom of the rubber boot is angled, it will fit better one way than the other.
6. Set the leather boot on top of the rubber boot.
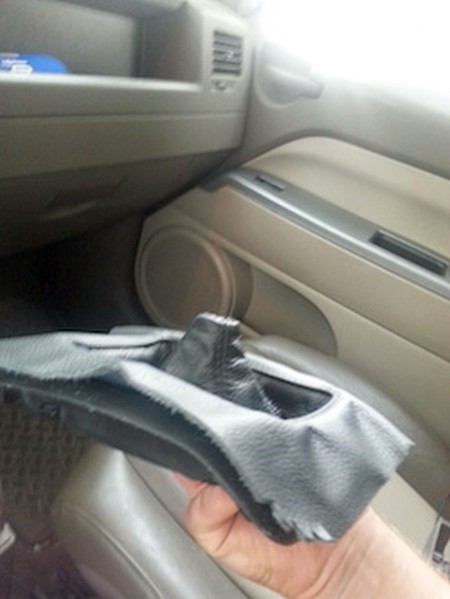
7. Slowly begin to put the rubber boot back onto the plastic piece, tucking the leather under the rubber as you go. It is easiest to start at one corner and work your way around.
8. Be patient and only work a small area at a time.
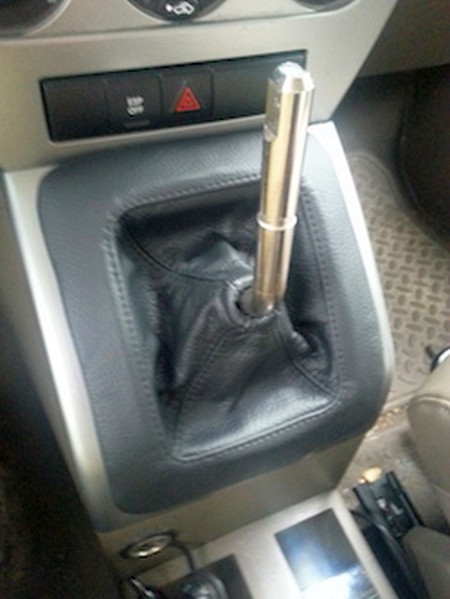
9. Put the boots and plastic piece back into place the same way they were removed. Slide the shift nob back on and you're done!
ARMREST COVER
1. You will need a G20 Torx screwdriver, cleaner, glue and a brush. Any good leather/upholstery glue you can find at a hardware store will do. Just follow the instructions on the glue container and everything will work fine.
Our customers have often used Elmers Glue or Amazing Goop with satisfactory results but really - your nearest hardware store will be the best source.
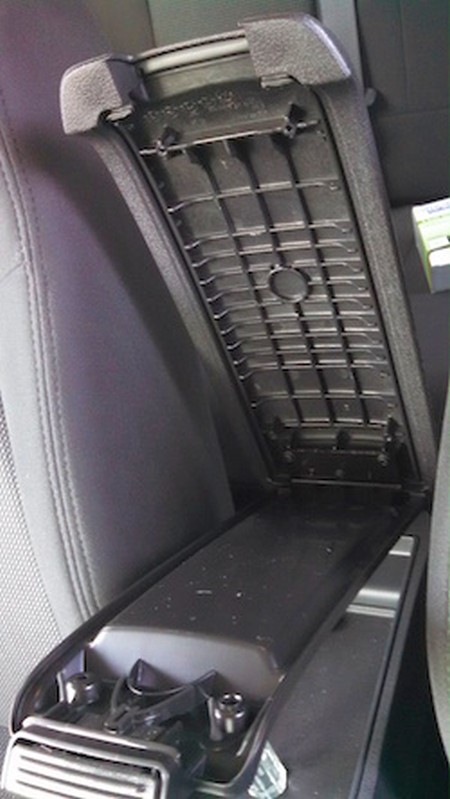
Open the armrest to reveal the torx screws on the underside. Remove the four visible Torx screws for the black plastic cover using a T20 Torx screwdriver, and place them safely off to the side.
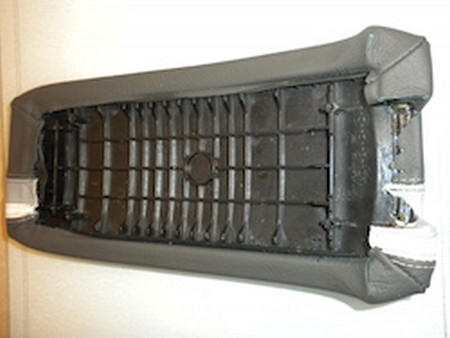
2. Once the four Torx screws are removed, you can separate the black plastic cover from the armrest assembly by pulling it down.
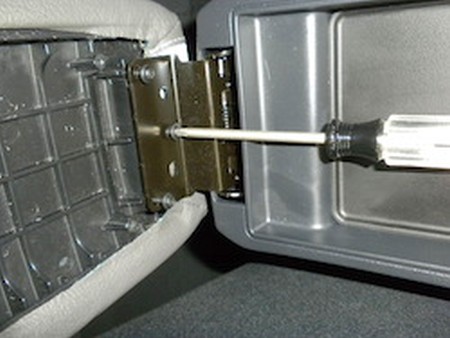
3. After the black plastic cover is removed, the last three remaining Torx screws are exposed. These screws mount the armrest to the center console hinge.
4. Clean the surface of your armrest with alcohol to make sure the glue bonds well.
Test-fit the cover on the armrest to make sure you understand how it fits on the amrest before you proceed with glueing!
Once you are sure you can align it well, place leather cover upside down on a table. Using a brush apply glue to it, leaving about 2 inches from the edges of the cover glue-less.
Align the armrest inside the cover carefully, make sure to do it quickly before the glue sets. Once you are sure you aligned it well, let the glue cure.
Proceed the glue the edges carefully, one by one - apply glue to the remaining part of cover next to it's edge, press it tightly to the armrest base and let the glue cure before proceeding to the next edge.
5. Reverse steps 1 through 3 to reinstall the armrest in the car.
Useful tip
You have installed a product made out of genuine leather. As you know, to maintain a leather product in good condition, you should take care of it. We suggest occasionally (every 4-6 week for example) applying some leather conditioner/UV protector to keep your leather from drying up in the sun and cracking.
Redline Automotive Accessories Corp. will not be held liable for any labor, incidental or consequential damages of any kind. Proceed at your own risk.