|
||||||||||||
|
1. Materials needed:
1. Phillips screwdriver (a "stubby" is recommended) 2. Small putty knife 3. Adhesive (for leather and vinyl) 4. Spare plastic clips for door panel (Mazda part)
|
|
|
2. Remove the armrests
The armrests are held in place by two screws, which require door panel removal for access. There are three screws holding the door panel in place, one behind the door latch, one underneath the top cap of the door pull, and one inside the bottle holder. Once the screws are removed, grab the door panel at the lower rear corner and give a sharp pull. You will hear several of the plastic clips release. The panel only needs to be pulled far enough to access the armrest screws. A stubby Phillips screwdriver will make this job easy.
Note: It's easy to damage one or more of the plastic clips. If you don't buy a few spares before starting the job, you will be certain to damage them! A few spares is cheap insurance.
Once the armrest has been unscrewed, it will lift out with a bit of encouragement. It's not necessary to remove the black rubber armrest from its white PVC frame. |
|
|
3. Attach the leather
Dry-fit the leather armrest cover over the armrest. Pay attention to how the edges align. You will want to align the forward and outside edges exactly.
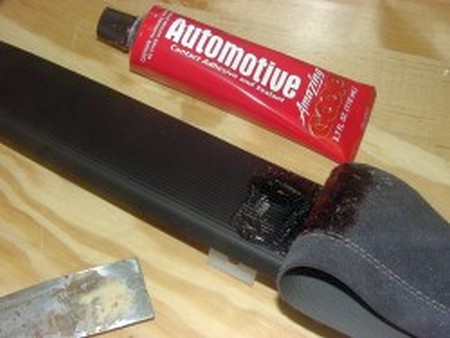
Note: The required adhesive must be rated for leather and vinyl. I used "Automotive Goop" which cost about $3.50 at a local discount store. "Goop" is a contact cement, which sets up fairly quickly, so there isn't a lot of time for adjusting the leather. Be patient and be careful.
Starting with the forward edge, apply adhesive along one inch of both the rubber armrest and the underside of the leather. Do not put adhesive on the curved edge surface of the armrest, yet. We'll do that later. Spread thin with the putty knife. Wipe the knife blade after each use; it will keep the work area clean. Carefully align the leather and rubber armrest and press the two surfaces together. Working one inch at a time, continue applying adhesive to the rubber and leather surfaces until the entire top is completed. Then do the edge, carefully folding the excess leather underneath the curved (interior) edge of the armrest. If needed, trim any excess leather around the snaps on the PVC armrest frame.
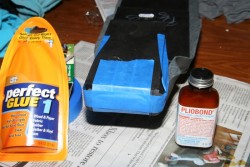
Same applies to the leather cover for the Zeta armrest, just glue it on the armrest using quality glues. What we've found to work great was Liquid Nails Perfect Glue #1 on the top (it allows you to make adjustments for a second before it dries) and Pliobond Industrial Contact Cement on the sides... |
|
|
4. Re-assemble the armrest and door panel
Once the adhesive has been completed, simply press the covered armrest and frame back into position on the door. Re-attach the armrest screws, replace any damaged plastic door clips, press the door back into place, re-attach the door panel screws, and replace any plastic trim covering the panel screws. You're done! |
|
|
5. The door pulls are mounted with velcro. Just wrap them around the actual pull and secure the velcro. |
|
Useful tip
You have installed a product made out of genuine leather. As you know, to maintain a leather product in good condition, you should take care of it. We suggest occasionally (every 4-6 week for example) applying some leather conditioner/UV protector to keep your leather from drying up in the sun and cracking. |
|
Subscribe to our newsletter to get an instant 20% discount!