2007-15 MINI COOPER |
||||||||||||||||||||||||||||||||||||||||||||||||||||
|
1. The first thing to do is to remove the e-brake handle cap. I pried mine off with a screwdriver. Some people have been able to just pull it off. It is held in place by two plastic tabs. |  |
|
2. Next, release the tab that holds the rest of the handle in place. I used a small screwdriver to pry it. An ice pick might work. The point on the tab is very long, so it needs to be pried way up to release. Once you have the tab clear of the hole, slide the handle forward to keep the tab from going back in the hole. | 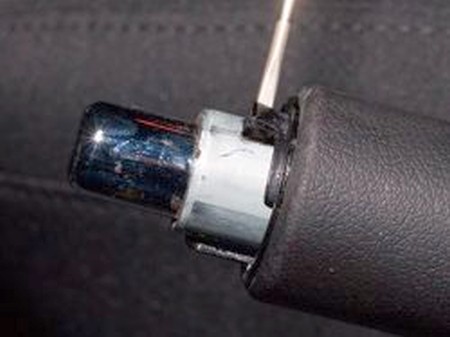 |
|
3. Now remove the boot from the console. It seems that the best way is to carefully pry each side of the plastic boot base in the middle to release the tabs holding it to the console. Then lift or pry the back end up. Be careful not to scar up the plastic of the console. | 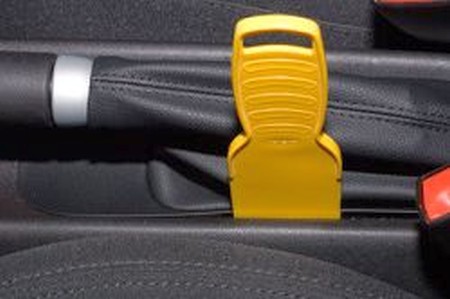 |
|
4. There is a tab in the front end of the boot base. So, best to tip it up from the back end and slide it back to release that tab (blue arrow below). I found it impossible not to break a couple of tabs off of the e-brake boot. These two tabs (red arrow) stick out farther than the others and are rather fragile. They don't seem critical in holding the boot in place. Mine stays down quite well without them. | 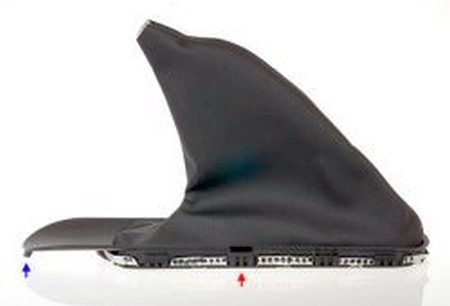 |
|
5. Turn the boot inside-out by pulling the base up and forward over the handle. You will find a plastic tie holding the boot to the handle. Cut this tie. I found that wire cutters work well. Careful not to cut the boot. | 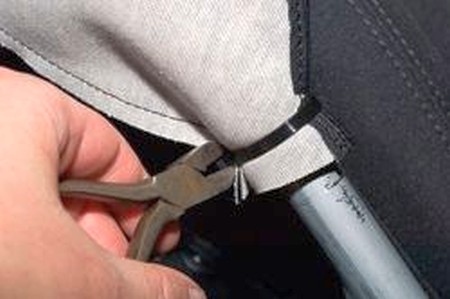 |
|
6. Slide the boot and handle off of the e-brake lever. The boot should still be inside-out. Extract the handle from inside the boot.
Remove the shift knob.
It is time to remove the Console to get at the underside of the shift boot. First remove the Torx 20 screw in the bottom of the rear cup holder. | 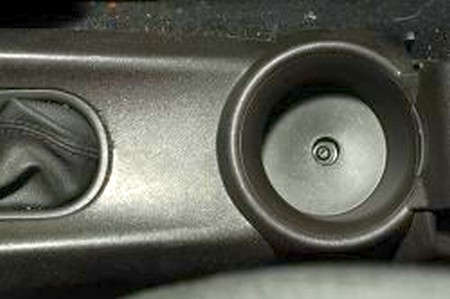 |
|
7. Next remove the Torx 30 screw in each of the front cup holders.
There are three latching mechanisms that hold the center console in place. First, pull the center console backwards about 12 to 20 mm. There is a slide latch on the left side three quarters of the way back on the eBrake boot driver side. This action gets the console off the slide latch. Do not pull too far back as there are 2 more vertical pins into receiver connections about center of the console on either side. Once pulled back slightly, grasp the console on both sides in the middle and pull up until the vertical pins release. This takes a little effort but the console will POP up and off. The console should now be loose but do not try to remove. |  |
|
8. The console has three electrical connections underneath. The wires are not very long so the console will not come all the way off the shift handle. Tilt the console to one side and unplug the three connectors. The connector for the Sport button and DSC/ASC button group (C below) has a catch on each side. There isn't enough space for fingers, so use a screwdriver to release them. Here are some photos to show you where they are: | 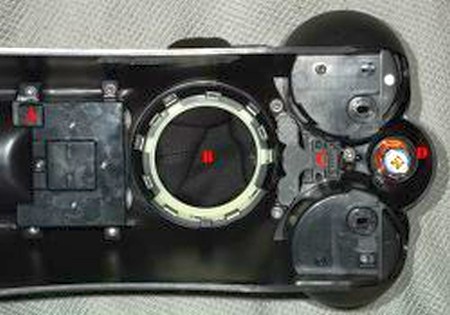 |
|
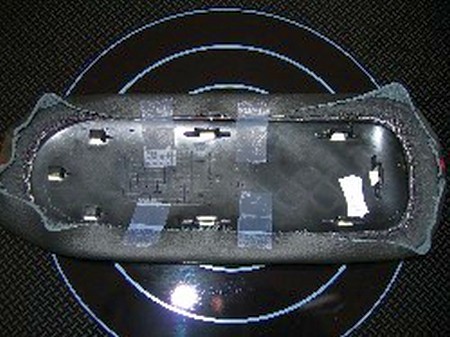
9. With the three electrical connectors disconnected, work the console up off the shift lever. Remove the console from the car. Now you can remove the shift boot from the console.
The red arrows point toward the larger tabs that hold the boot in the console. They have to be pushed in towards the center of the circle to release from the console. When they are free, the boot and rings can be removed from the console. It helps to have eight hands to push all the tabs at once and remove the boot. Otherwise, try to free one side and work your way around. | 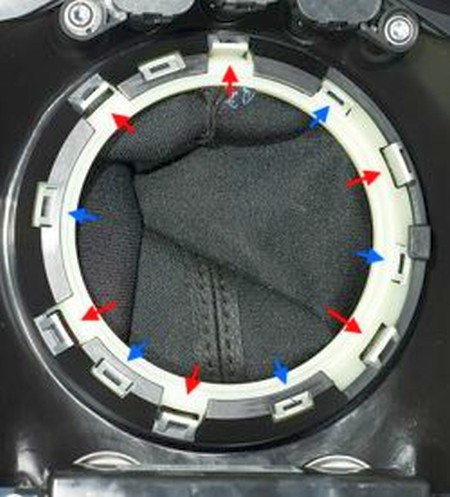 |
|
10. Next, try to gently release the small tabs to remove the bottom ring from the top chrome ring. The tabs are very fragile. I broke most of them and repaired them with CA glue. However, they are not really necessary as tabs, but they do help hold the boot in place while assembling.
Notice that both rings have a small triangle showing which way should be facing towards the front of the car. | 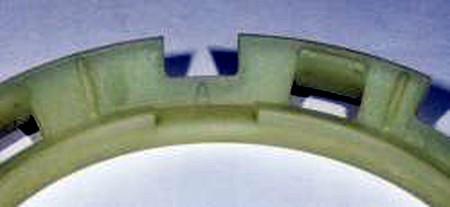 |
|
11. With the rings free, you can prepare the Redline leather shift boot so it will fit between the rings. The leather on mine was about twice as thick as the factory boot. You can carefully skive the bottom 20mm (approx) of the inside of the boot leather to help it fit between the rings. You could use a sharp knife if you have some skill. Otherwise, use sandpaper or a rasp. I ended up not doing this. The leather already has some slits in to go over the tabs in the chrome ring. Only about half of the slots matched the tabs, so I had to enlarge some and create one or two new slits. Line up the front seam in the leather with the front marker on the chrome ring. On my boot, the two seams were not identical. Note that the boot is inside out and the rings are upside-down.
Lower bottom ring (shown on top) onto the chrome ring tabs. You may or may not be able to get the small tabs to engage -- depending on how much you thinned the leather.
At this point you need to install a plastic in the top of the boot. Turn the factory shift boot inside out and you will find this plastic ring. It is held in place (sort of) with some double-sided tape, so it is easy to remove. I thought I had photographed, but seem to have missed it. Sorry.
Atach the ring to the ring to the leather boot with the front seam lined up with a vertical ridge inside the ring. I glued mine in place.
Tun the boot right-side-out. Align the front marker on the chrome ring with the front of the console and insert the boot assembly into the console. The boot rings only fit into the console one way. Check from the bottom to see that all the large tabs engaged. | 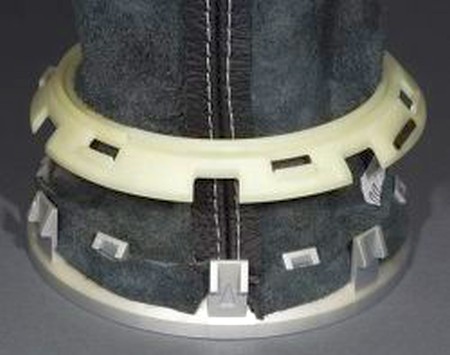 |
|
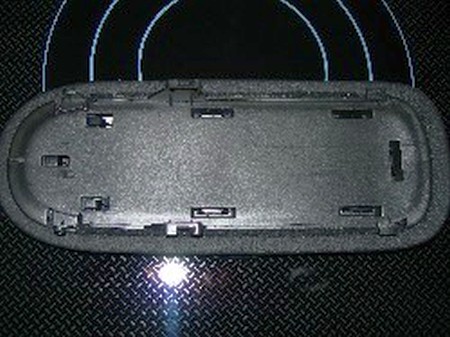
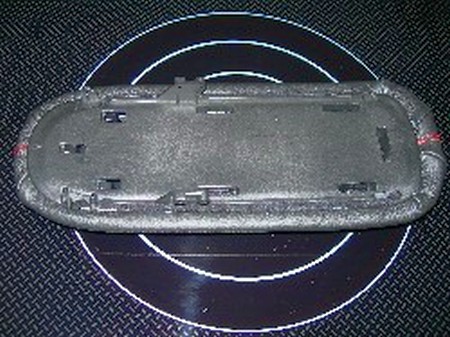
12. This is what the console looks like without the boot. The console can now be reinstalled in the MINI by reversing the disassembly process. Carefully feed the shift lever into the boot. Position the console so it is a little rearwards of where it belongs. When it is down properly, slide it forward to engage the latches. Line up the holes for the screws in the front cup holders and screw them in. Position the rear cup holder and screw it down. Install the shift knob. | 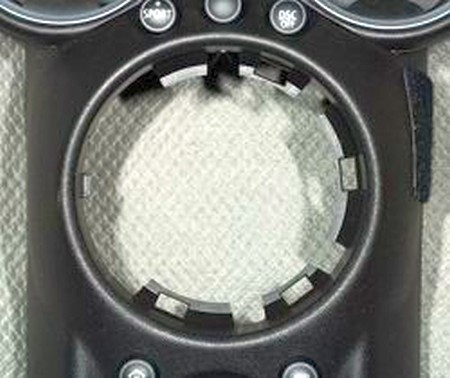 |
|
13. The eBrake boot is still not installed.There are two rings on the bottom of the boot. They are held together with the same tabs that hold the assembly in the console. Carefully pry the tabs just enough to release the bottom ring and remove it. The tabs are very fragile. Peel the old boot off of the top (larger) ring and remove it.
Insert the RedlineGoods leather boot into the top ring and fold the tabs up as pictured below. I glued mine in place. It made assembly easier and will insure that the boot can't be pulled up out of the rings. You may need to skive the leather on the tabs to get the bottom ring back on. This is especially true on the front and back ends. It is not so necessary on the sides. | 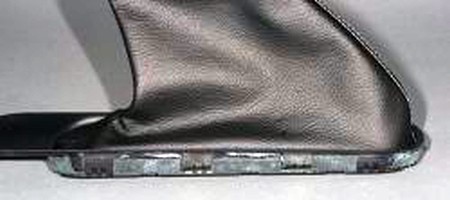 |
|
14. Replace the bottom ring and snap the tabs over the prongs on the top ring.
Turn the leather boot inside-out. | 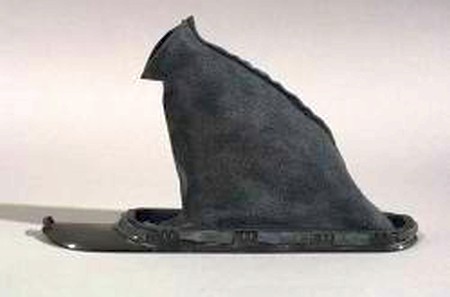 |
|
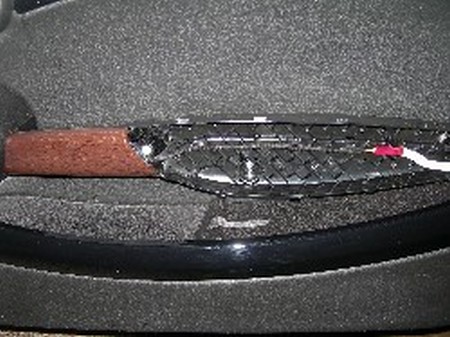
15. From the bottom, insert the eBrake handle -- back end first. These photos show my eBrake handle. Orient the handle so the set screw is at the top.
If you are using the factory handle, do not put the cap on it yet.
Wrap a plastic tie around the boot so that it will tighten into the groove in the handle. Tighten it and clip the extra length off with wire cutters. | 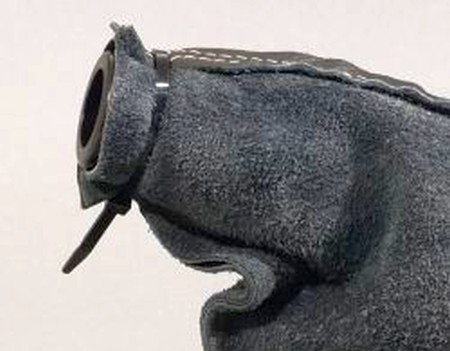 |
|
16. With the boot still inside out, slide the handle onto the brake lever as far as it will go. Pull the boot back far enough to see that the button is sticking all of the way out of the handle.
Tighten the stainless steel setscrew in the aluminum adaptor to hold the handle in place. There will be a hex wrench taped to the underside of one of the flaps in the shipping box. This is a 1/8 hex wrench that fits the setscrew on the handle.
With the factory handle, slide it on until the tab drops into the hole on the top of the brake lever.
Pull the boot back so it is right-side-out. Slip the tab on the front of the plastic base into the front of the opening in the console. Then push the base down into the console until it snaps into place. | 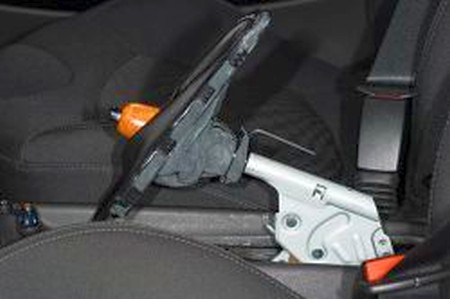 |
Materials needed: - Glue (super glue works fine, or 3M-90 High Strength Spray Adhesive) - Xacto Knife & flathead screwdriver - Loctite all purpose |
 |
|
1. Slide cover back and lift out (you may want to mark the front to avoid confusion when reinstalling however, there are sliding tabs on the front) |
 |
|
5. Lay the leather on a flat surface rough side up and place the cover on the leather. Note, I did not remove the vinyl simply installed leather over vinyl. Gather the leather around the edges and use tape to hold in place. Scotch tape will do just fine. |
 |
|
6. Slide the cover over the 3 front tabs ensuring the leather stays in place and then snap the rest of the tabs into place. You may have to use a flat blade to tuck leather in here and there. Once all is back together, take a razor knife and cut the tape close to the edge and remove from leather. |
 |
|
7. Reinstall lid on console. Take your time with this so as not to break any tabs. |
 |
|
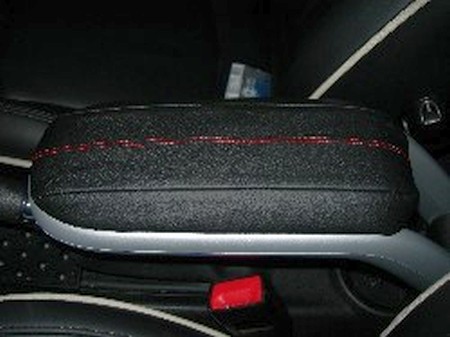
8. Place thumbs in middle of arm rest and 8 fingers along the top edge and gently lift up and pull towards you. There are several tabs about 3/16s tall to raise the arm rest over. There are tabs on the underside as well. (Careful, the ambient lighting wiring is behind the arm rest. Do not curl your fingers over the edge and pull out the wiring. Just keep fingers on the edge.) The arm rests are easily removed with a little nudge. |
 |
|
9. Warm your leather and the arm rest with a hair dryer or place them near your wood stove as I did. This will make the next steps easier. We suggest you get the lay of the land here and go through your application of leather here before using spray glue. (Note we did not remove vinyl, simply glued leather to vinyl). |
 |
|
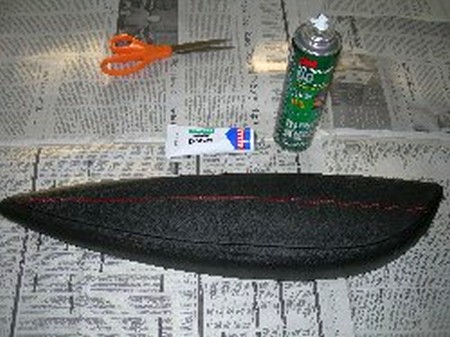
10. Spray the inside of the leather with 3M-90 High Strength Spray Adhesive (Home Depot or similar) and set aside (See Picture). Light spray on leather. Try not to over spray and get on show side of leather. |
 |
|
15. You may have to use some scissors to cut the front and back ends so the leather does not bunch up on the corners. Now is the time to remove any glue that may have gotten on leather. |
 |
|
Useful tip You have installed a product made out of genuine leather. As you know, to maintain a leather product in good condition, you should take care of it. We suggest occasionally (every 4-6 week for example) applying some leather conditioner/UV protector to keep your leather from drying up in the sun and cracking. |
|
Subscribe to our newsletter to get an instant 20% discount!