2000-06 NISSAN SENTRA B15 |
||||||||||||||||||||||||||||||||||||||
|
SCROLL DOWN FOR GAUGE HOOD INSTALLATION |
 |
|
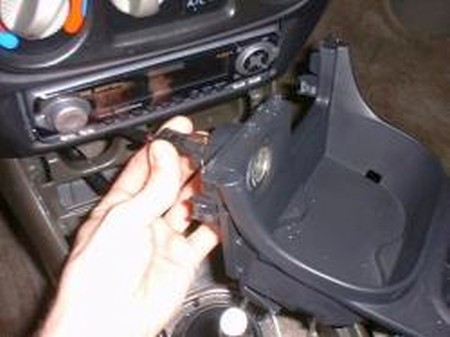
2. Unclip the cigarette lighter harness once the trim piece is removed |
 |
|
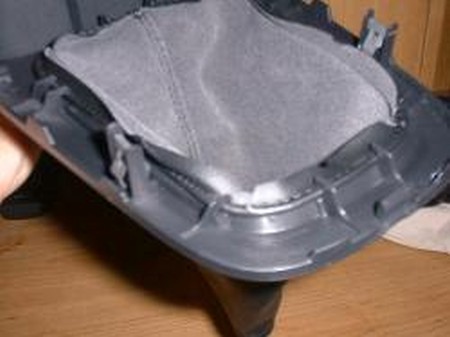
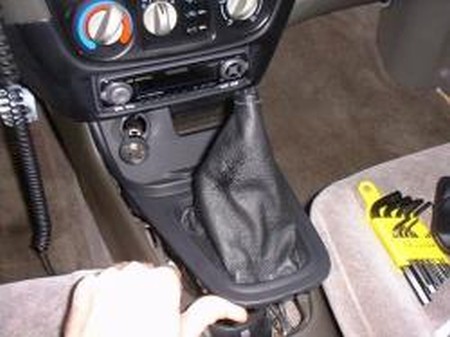
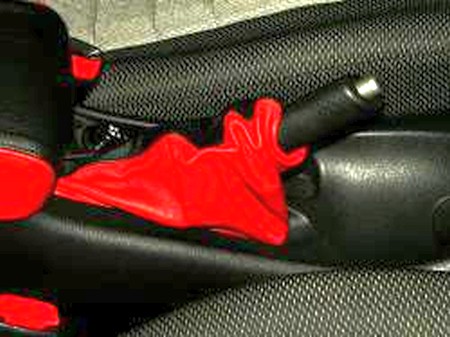
3. To remove the stock shift boot, pop it out from the clips that hold it into place. |
 |
|
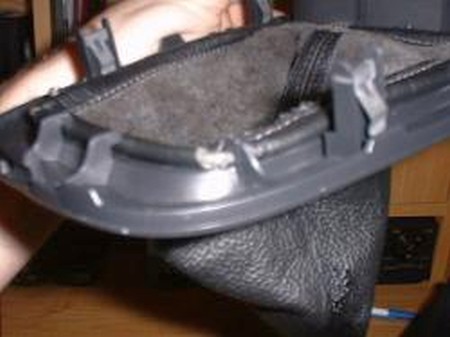
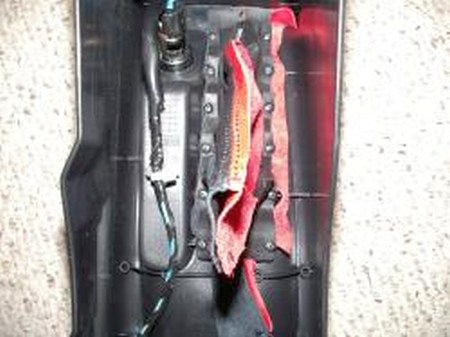
4. You now need to remove the wire from the old, stock boot and put it into the new one. Feel around the old boot for a place where the wire is connected, it should be in the midsection on one of the longer sides. Carefully cut the fold of the leather that holds the wire to reveal the joint. Take the joint off, you will need small pliers to do that. If you do it carefully, you will not hard the old boot and will be able to keep it as a spare. After removing the joint, pull the wire out of the stock boot and slip it into the folds of the new boot. |
|
|
5. To install the new boot just place it under the clips that held the stock boot into place. |
 |
|
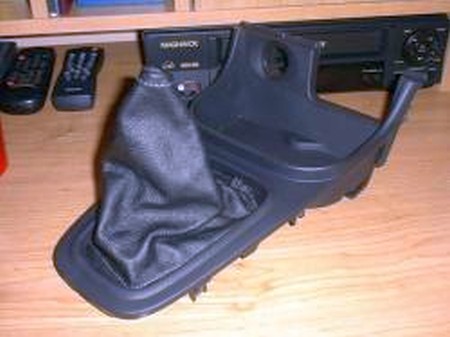
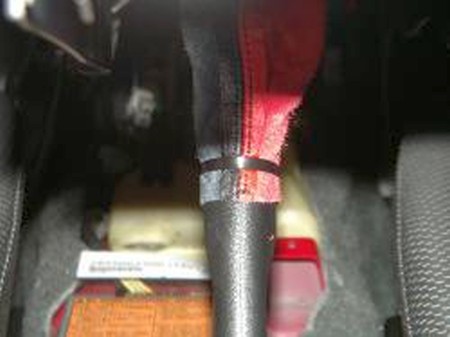
6. This is what you should see at this point.
NOTE: This picture is one of the first B15 boots ever made. Soon thereafter we have discovered that a better way for mounting the top of the shift boot would be to use a ZIP-tie, and thus the boots no longer have a seam around the top. To install the new boot, please turn it inside out at this point, mount the top of the boot with a ZIP-tie and lower the trim piece. The boot will switch to the correct side by itself as the trim piece is moved down. |
 |
|
7. Unless you are installing the ebrake boot as well, reinstall the trim piece by sliding the back part in first and the rest will go in by itself. Make sure the back part of the cigarette lighter doesn't catch. This will make it harder to put back in. Screw the shift knob back on. |
 |
|
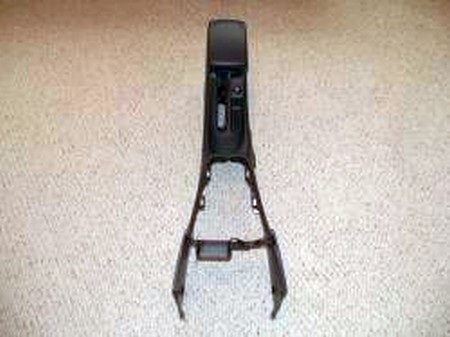
8. Remove the center console to fully expose the e-brake handle. To do that you need to remove 5 screws from console: 2 front, one under a small cover at the brake lever, 2 beneath the plastic cover at the rear by the cup holders. Then you need to pull off 2 plastic covers on each side underneath the dashboard, and the one around the cupholders, before taking the console up. After you lift the console, remove the cigarette lighter and other connections. |
 |
|
9. Pop out the rubber gasket surrounding the ebrake. Little buttons hold it on. We used only the 5 buttons from the rear down to hold it, because the boot won't reach reach the final 2 at the front. Turn the new boot inside out. Using the rubber as a guide, make slits about 8mm or so long corresponding to each button, about 5 mm from the edge of the boot. Use the slits to mount the boot with the buttons between the rubber gasket and the console. |
 |
|
10. Slide the new boot onto the e-brake handle top-first. Use a ZIP-tie to secure the top of the boot on the console. |
 |
|
11. Pull the console and, with it, the e-brake boot as far as it will go and re-install the center console. |
 |
|
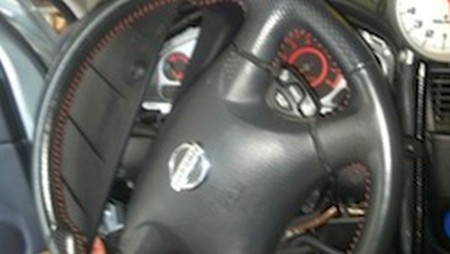
GAUGE HOOD INSTALLATION |
 |
|
2. Rotate the wheel and hood at the same time, hood will pop right out. |
 |
|
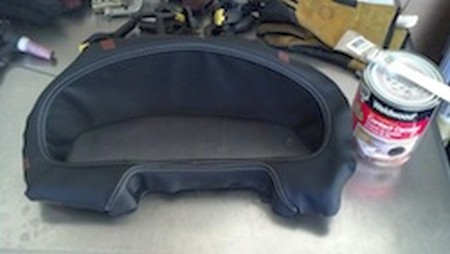
3. The wrap will come out of the box and lay over the factory plastic panel. You will need some clamps and contact cement: |
 |
|
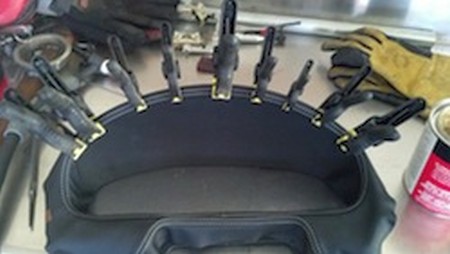
4. Take some time to get a plan of attack and an idea of where the leather will want to bunch or pull away. Then get started with the cement. I chose to do the flat upper panel first and clamp it in place until everything was dry. That allowed me to get the seam lined up and know that it wouldn't move later on. |
 |
|
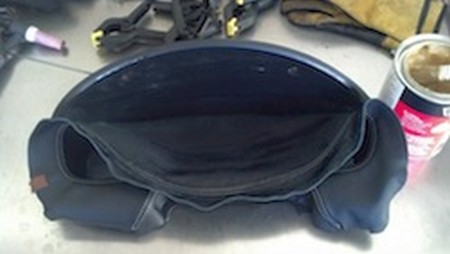
5. The bottom part around the steering column is a challenge but nothing that some patience and time cant fix. |
 |
|
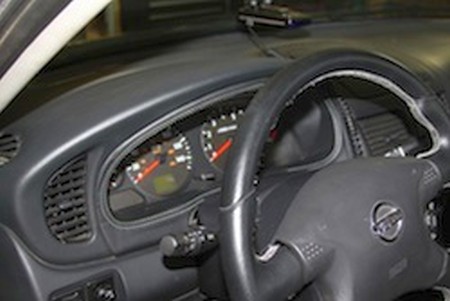
6. Reinstall in the reverse order as you took it out...remember to cut the holes for the 2 screws. |
 |
Useful tip
|
|
Subscribe to our newsletter to get an instant 20% discount!